|
Summary:
With the introduction of eSIM—a digital SIM card embedded directly into a device's hardware, replacing the need for a physical, removable card— traveling abroad and staying connected has never been easier. If you are a T-Mobile customer, you have everything necessary for seamless connectivity. However, if your home carrier is not T-Mobile, utilizing a travel eSIM can be extremely beneficial. First, check that your mobile phone is unlocked and of an eSIM-compatible model, then you may install an eSIM for travel. If you received your iPhone via your home carrier's plan, it is likely your phone is locked to only work with your home carrier's cell frequency. To see if your iPhone is locked, do Settings -> General -> About, and scroll down to see the "Carrier Lock" field. If it is unlocked, it should say "No SIM restrictions." Otherwise, you may call your carrier to ask them to unlock your phone. They might deny your request because you need to have owned the phone for at least six months. Alternatively, they could unlock it remotely, or they might require you to pay off your phone's remaining balance first. There are many eSIM vendors who promote their product through YouTube influencers. The prices are very competitive, so one has to look for support and features. For us, the support for iMessage is a crucial feature. You may purchase an eSIM for a specific country or for a region. The installation process may be a little bit different from brand to brand, but the configurations after installation are the same. Vincent and I just returned from a 19-day trip to Japan. I bought a 30-day, 5 GB data plan from Nomad for USD $11, while Vincent opted for a similar plan from Japan Wireless, which cost about USD $10. We deliberately purchased from two different brands to see if one would work better than the other. Both plans worked very well during our trip, including receiving and sending iMessages. We called each other using WhatsApp if we got separated in a crowded place. You may choose to call using Line, Facetime or any other voice-over-internet-protocol app. Here is an excellent article from Nomad on HOW-TO use iMessage with a travel eSIM. https://www.getnomad.app/blog/how-to-use-imessage-with-travel-esim In Summary,
Can I use iMessage with a data-only eSIM?
Yes, iMessage works perfectly with data-only eSIMs such as Nomad's travel
eSIMs. Since iMessage operates entirely over the internet, it only requires
a data connection—not SMS or voice capabilities.
Verify iMessage Settings
First, let's verify your current configuration:
Disable 'Send as SMS'
To avoid unexpected charges:
Installation:
Configurations:
1) Before leaving home:
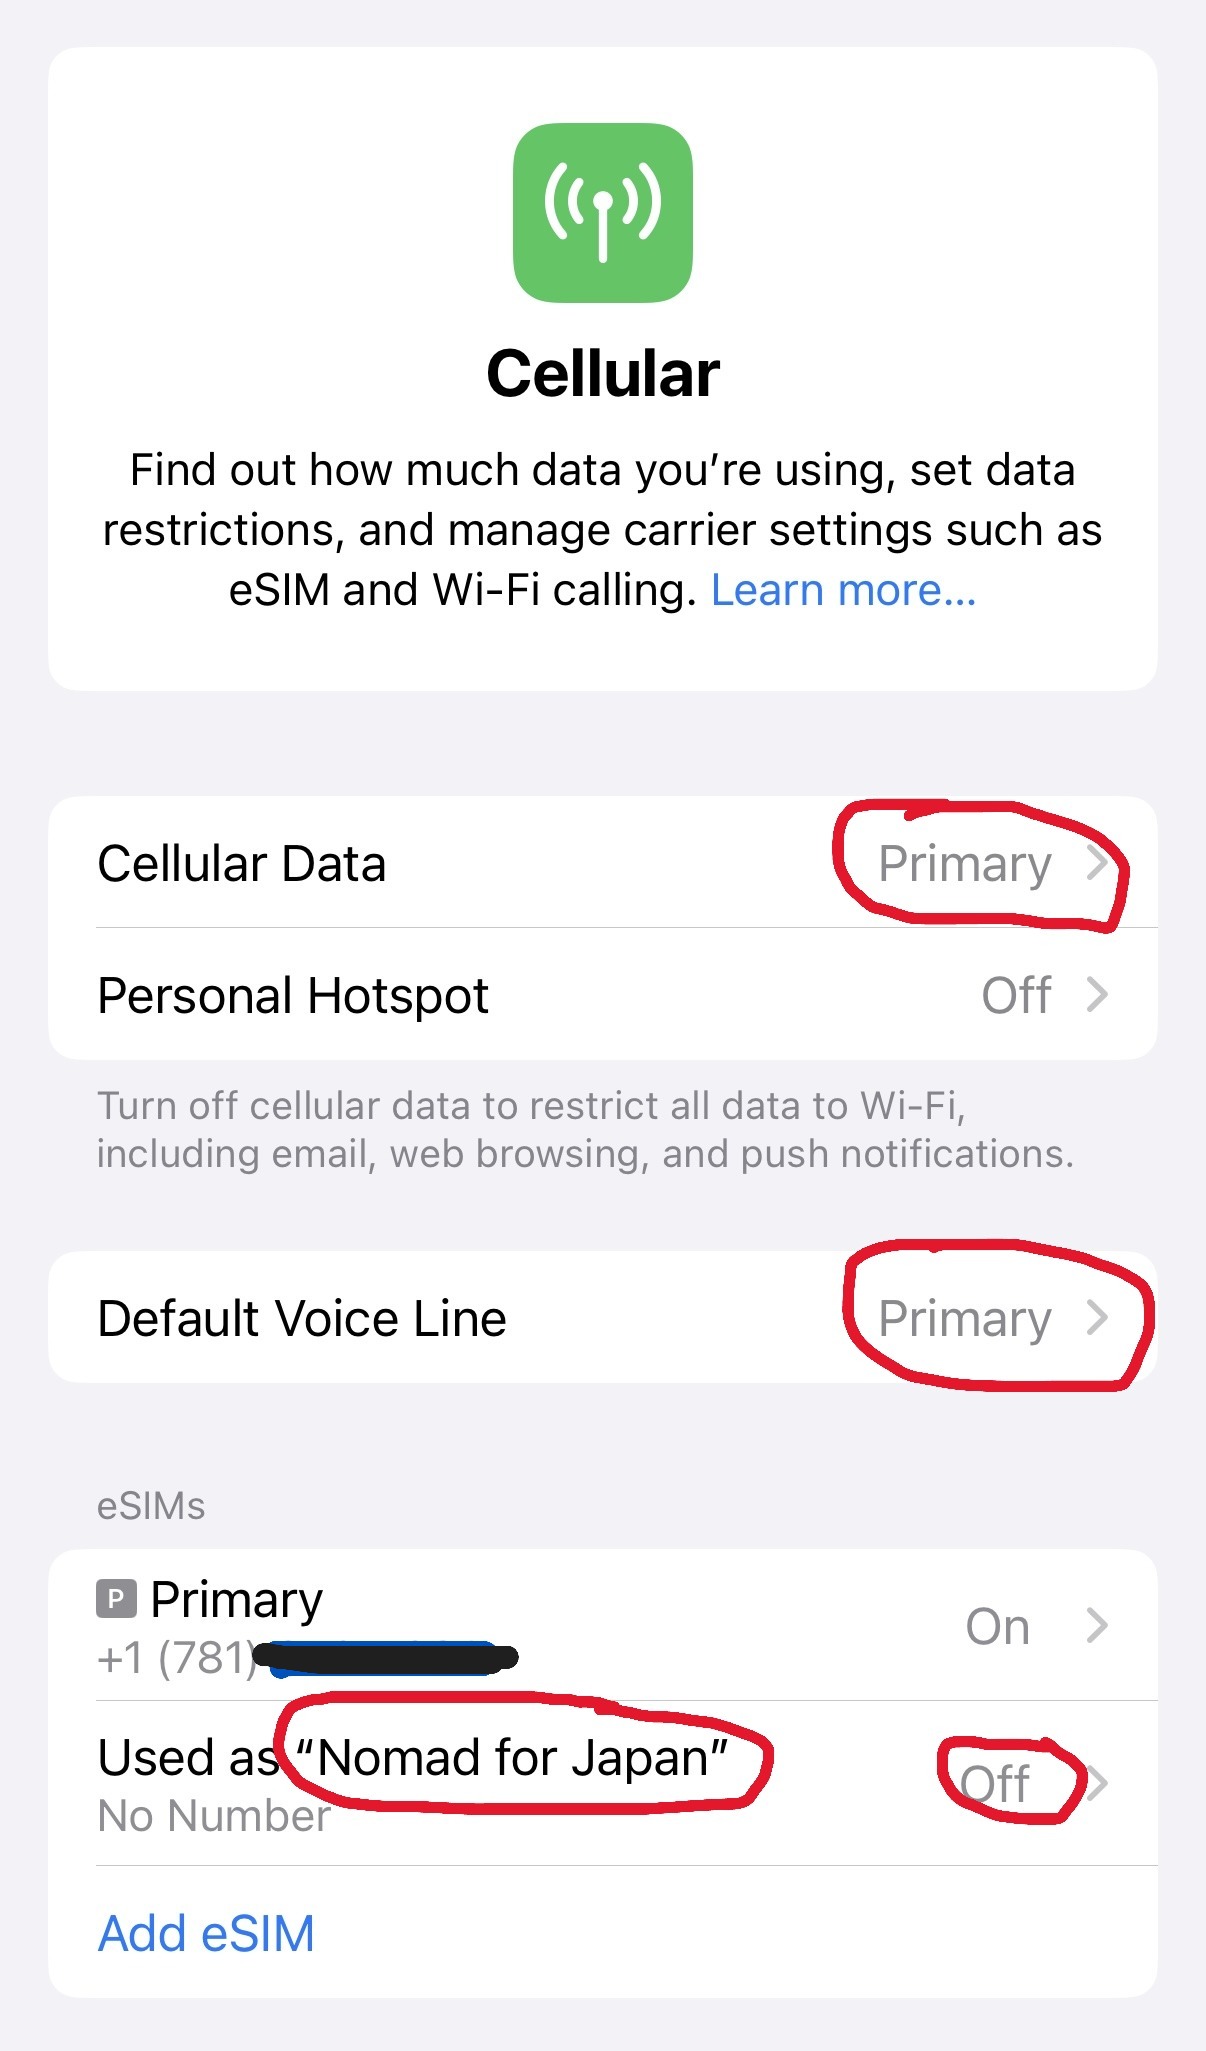
In Settings > Cellular > Cellular Data > select to use your Primary eSIM.
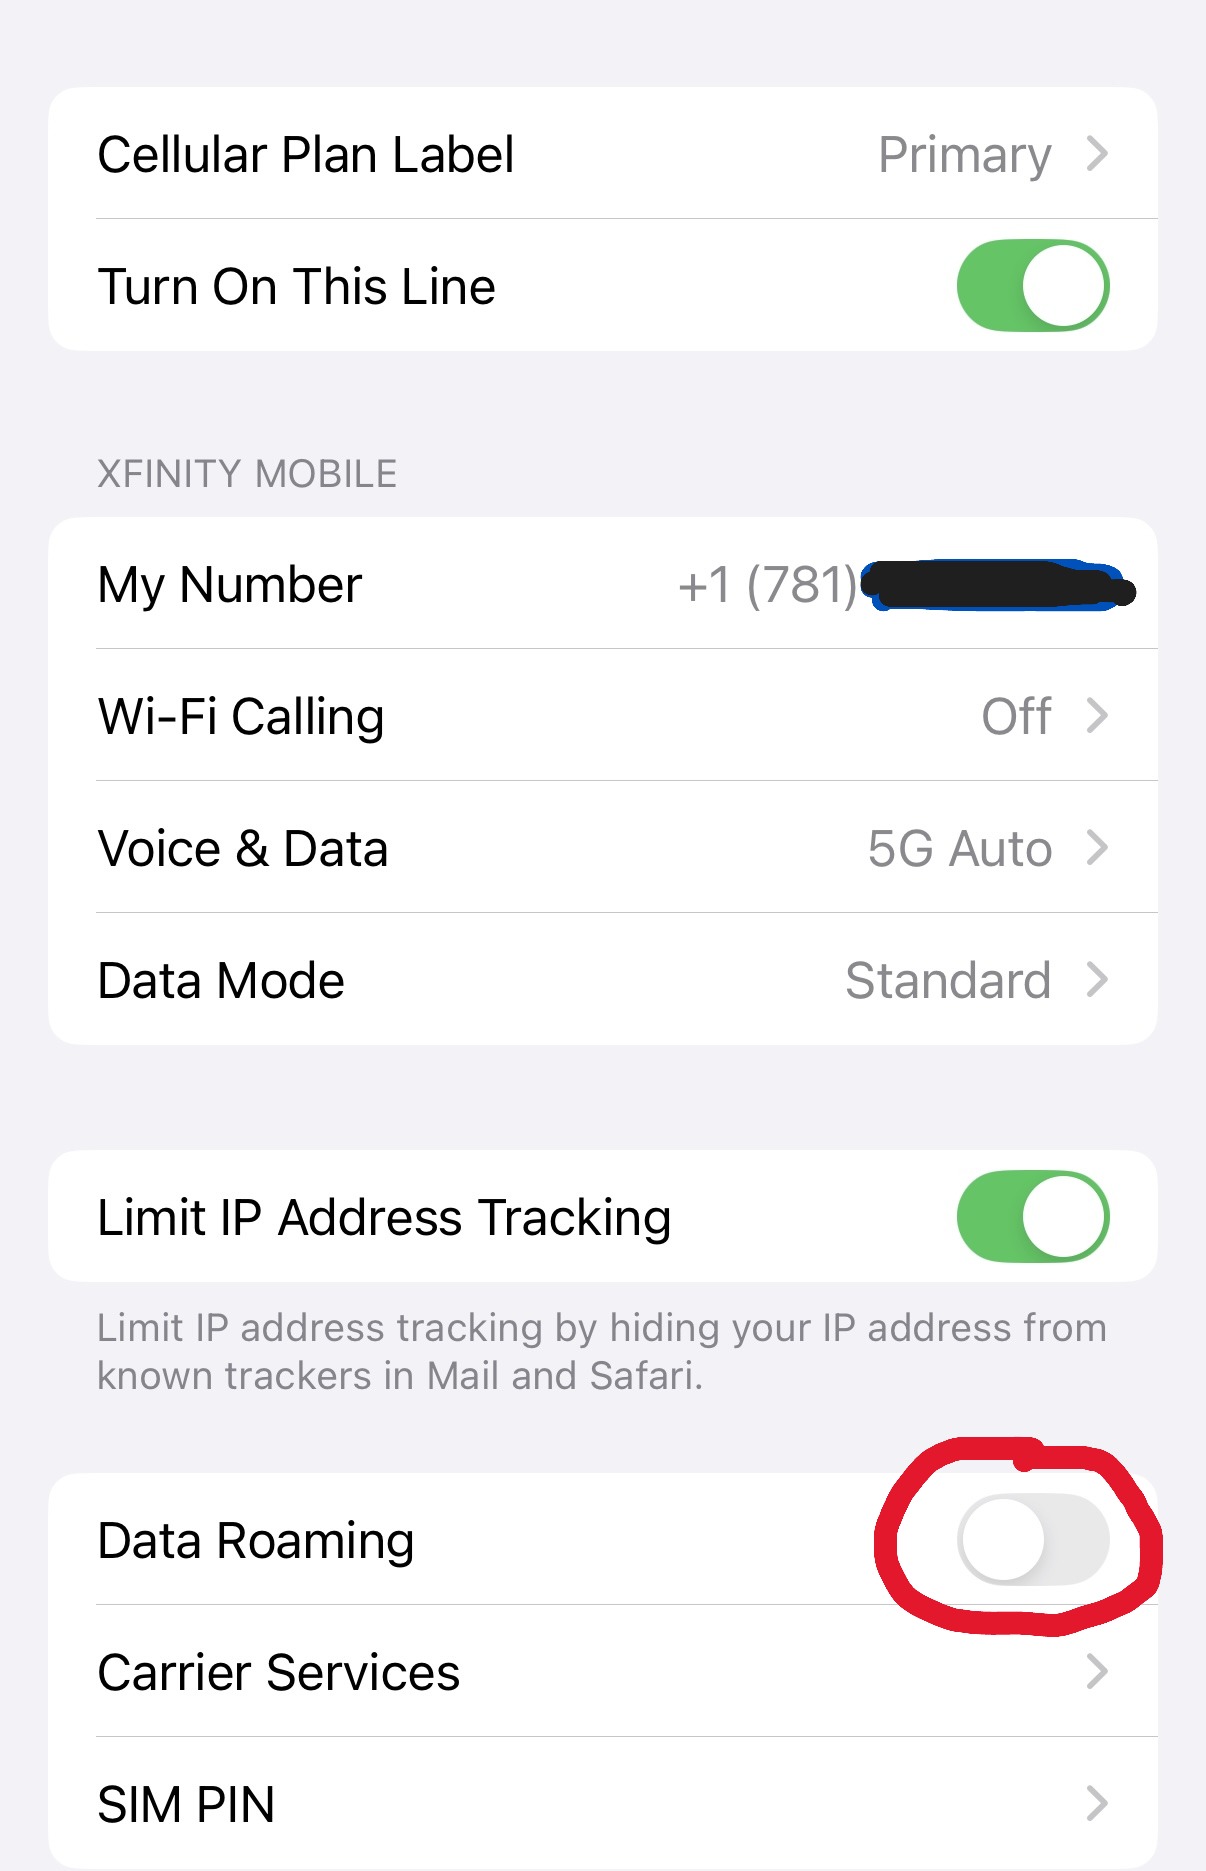
In Settings > Cellular > Primary, verify that the Data Roaming is OFF (not in green) for your Primary eSIM. It should remain OFF all the time.
2) After you have arrived at your destination
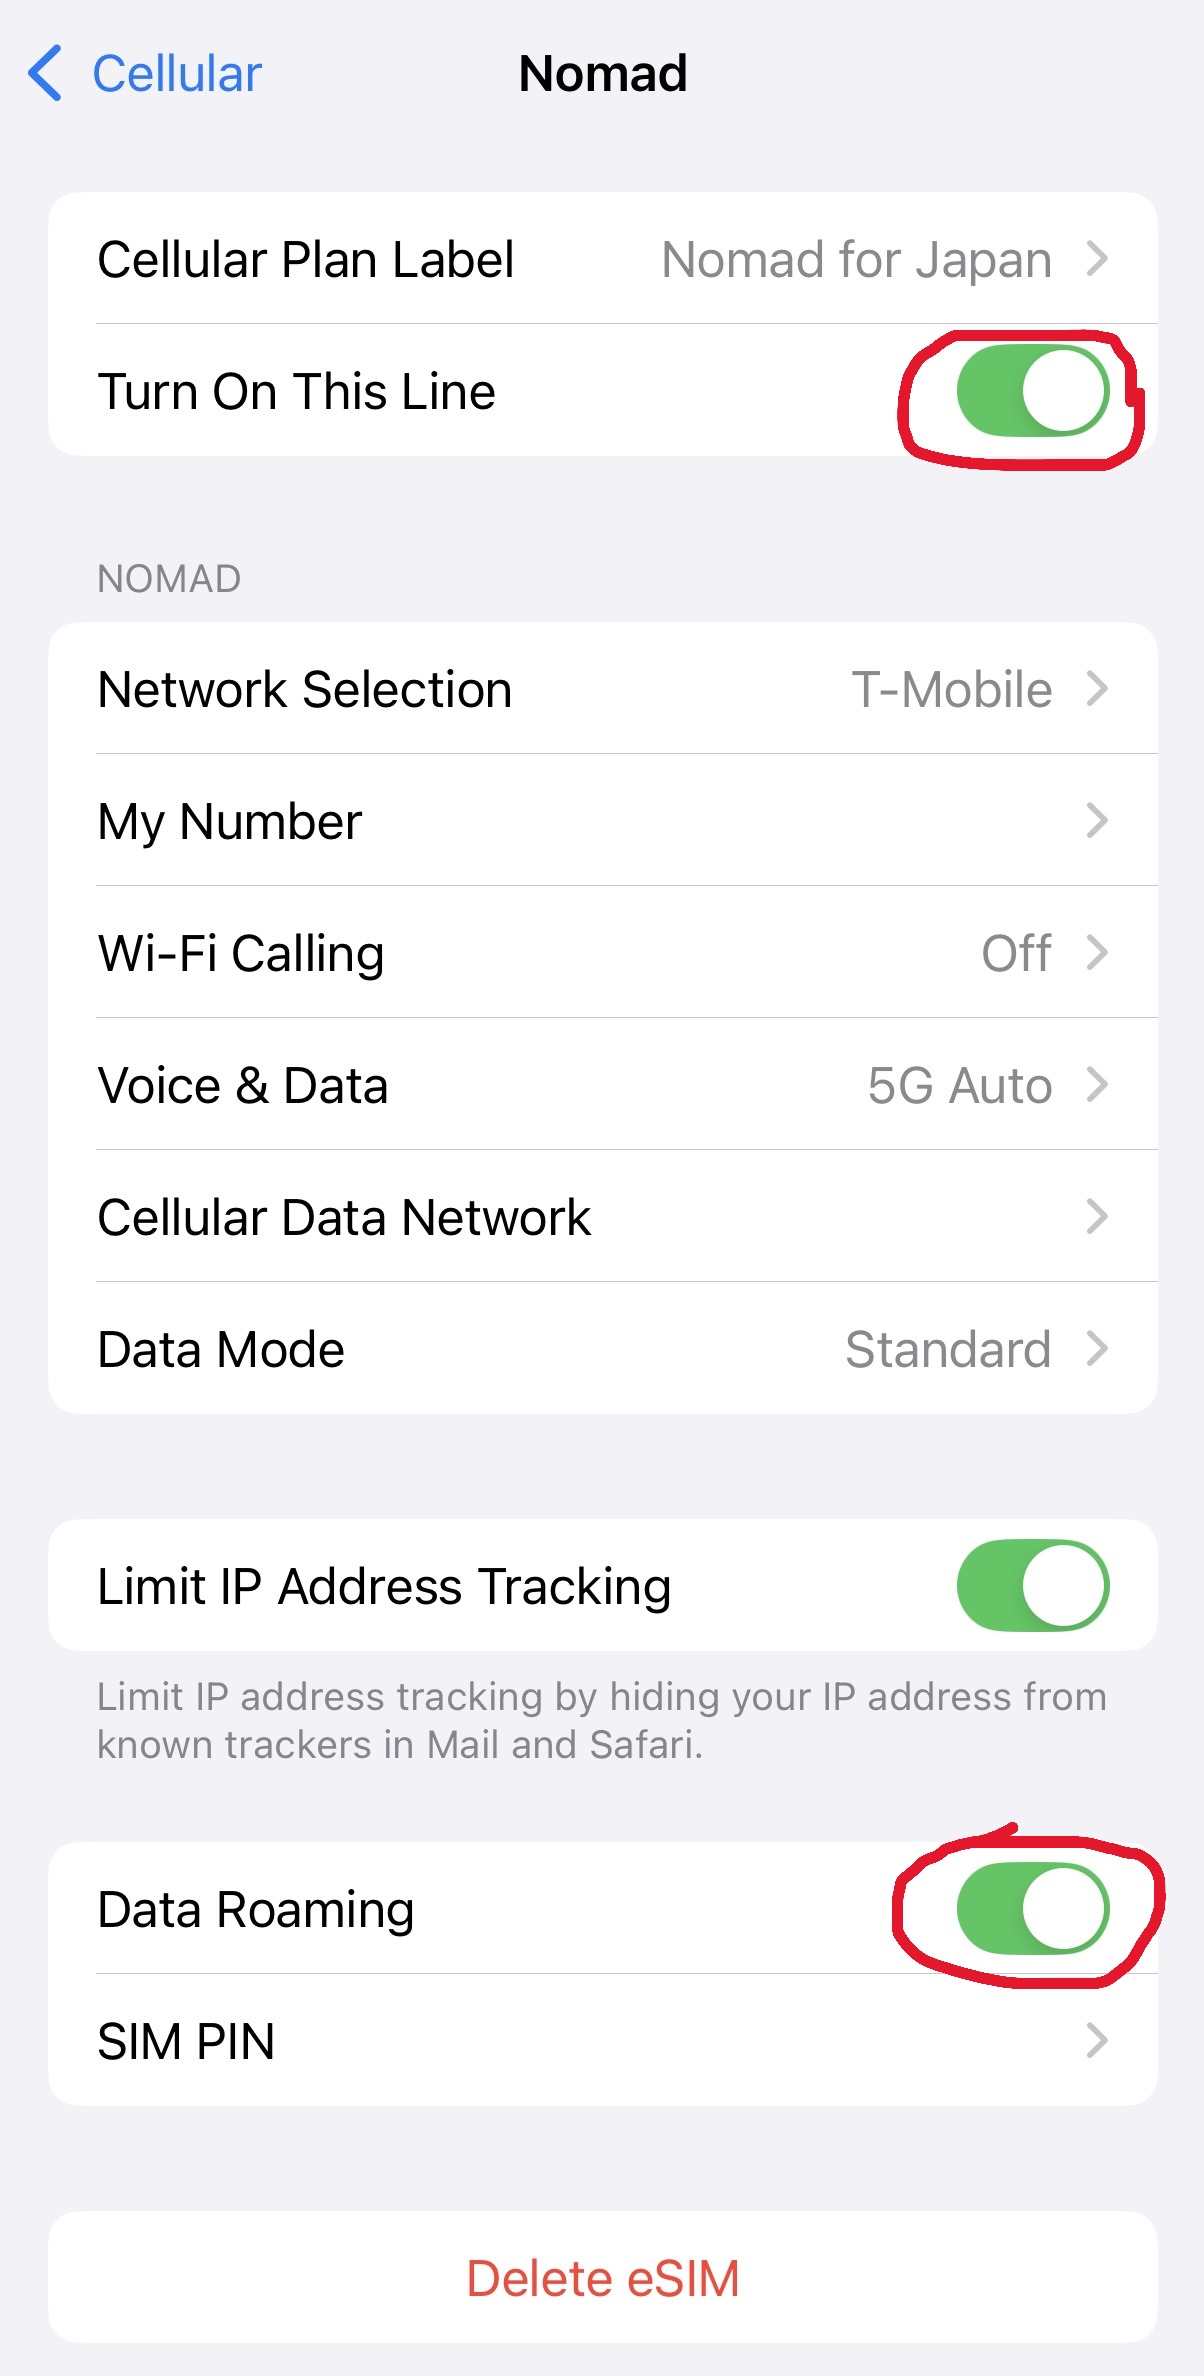
In Settings > Cellular > tap the name of your travel eSIM to Turn ON
This Line.
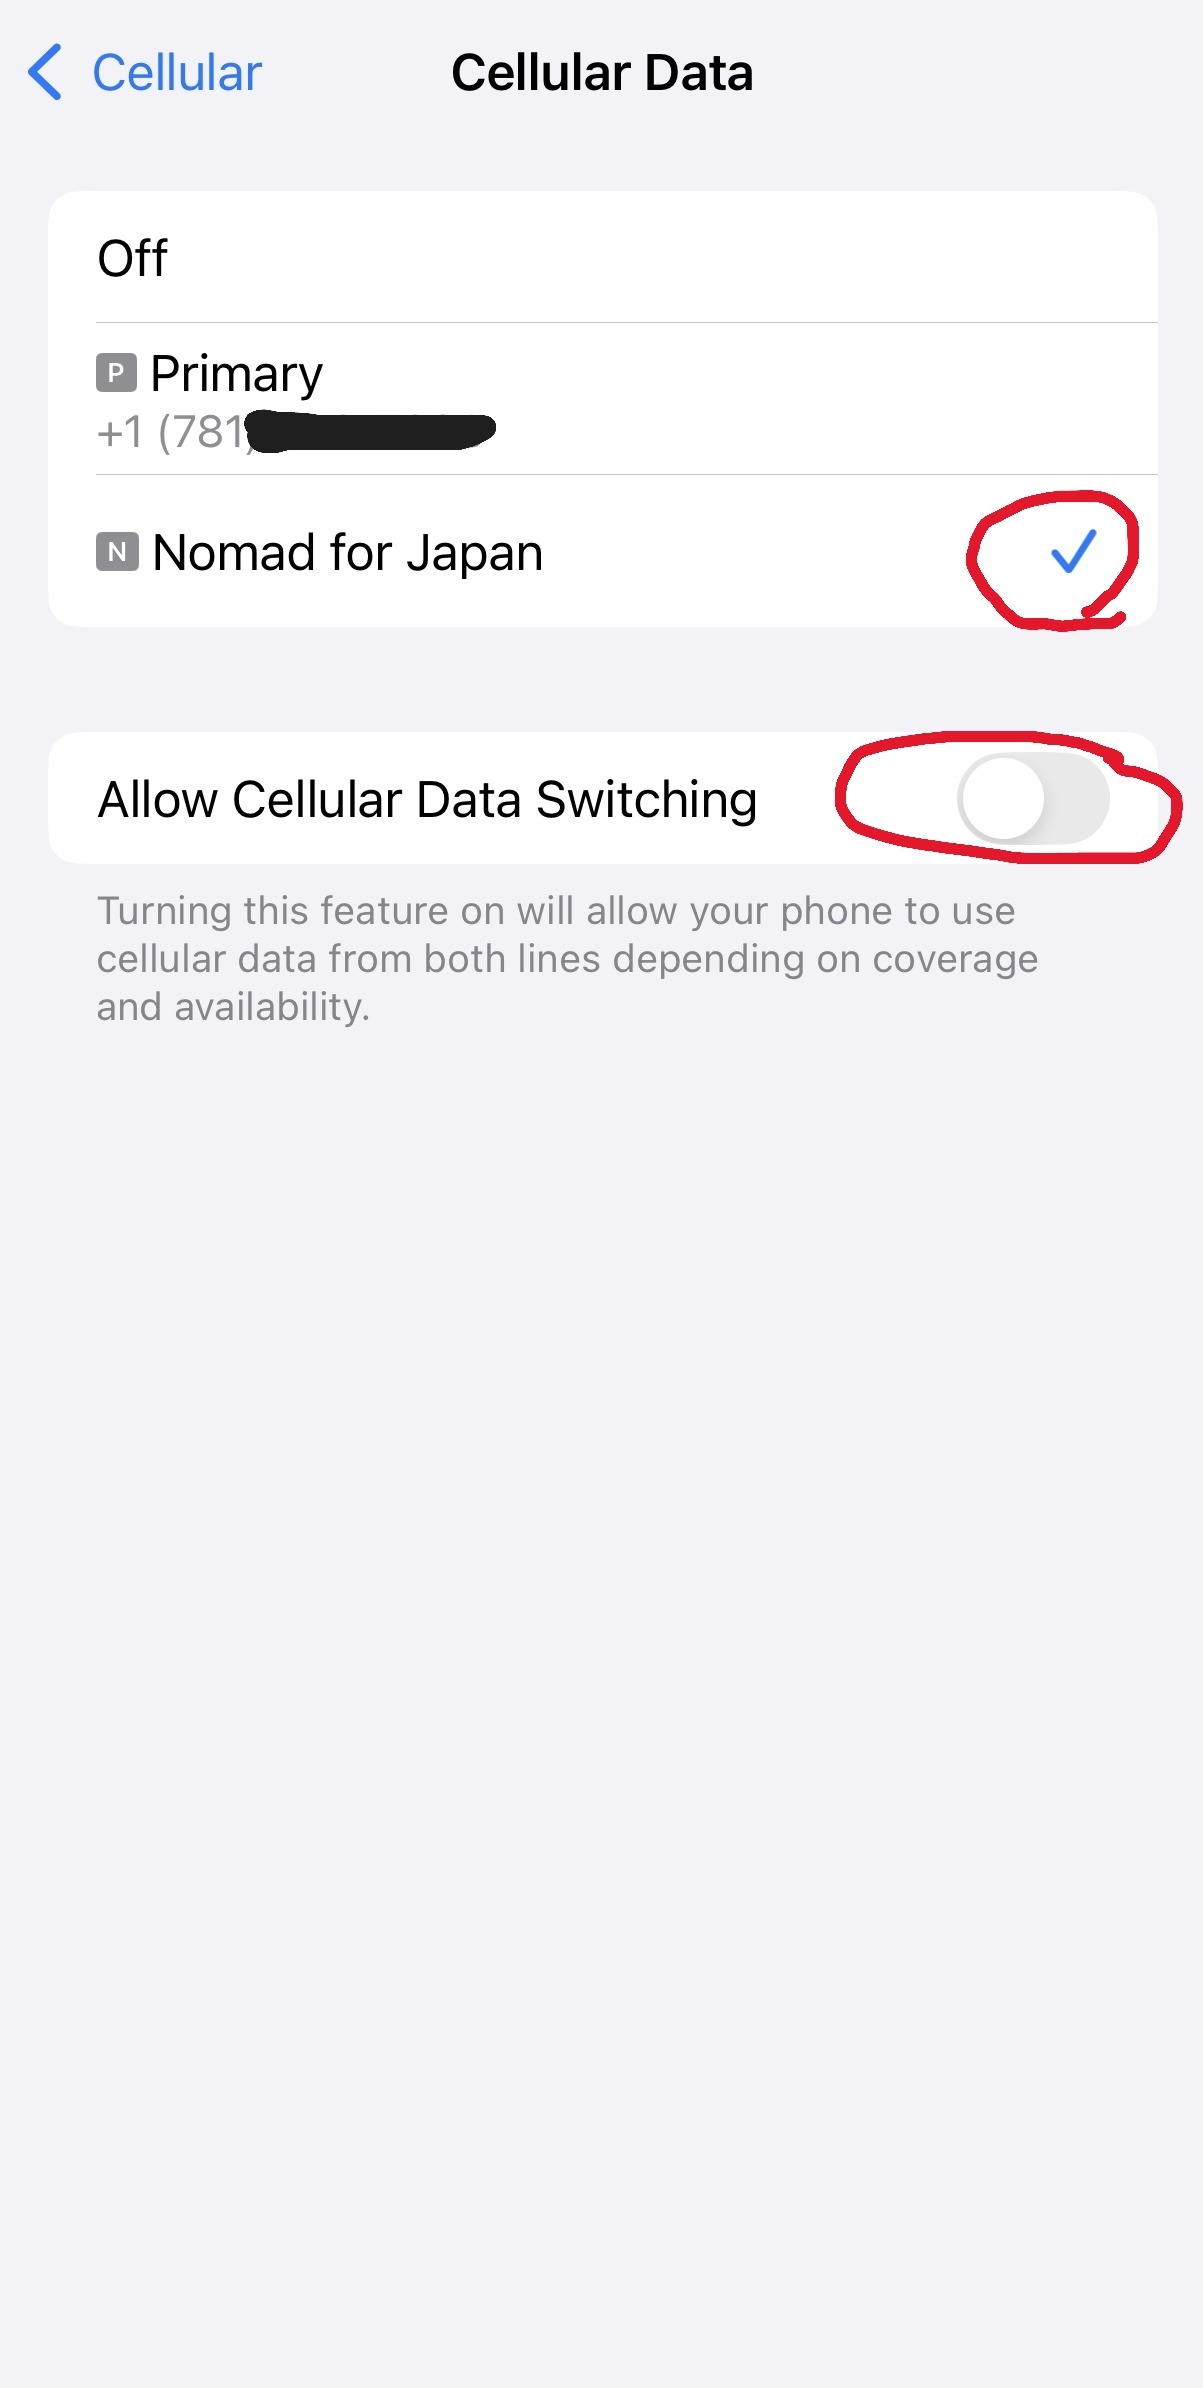
In Settings > Cellular > Cellular Data, select to use your travel eSIM for data, and DO NOT ALLOW for Cellular Data Switching. This way, your data usage will only come from your travel eSIM, and not your Primary.
At this point, in Settings > Cellular, you should have the screen similar to the above. Your Cellular Data is configured to use your travel eSIM, and you have both eSIMs ON. Double check the 5 steps in "Verify your iMessage Settings" in the Summary section to make sure you will send and receive iMessages from your US phone number. Perform disabling of "Send as Text Message" to disable sending as SMS (the green bubbles) as described in the Summary section. iMessages (the blue bubbles) are free when you are connect to the internet.
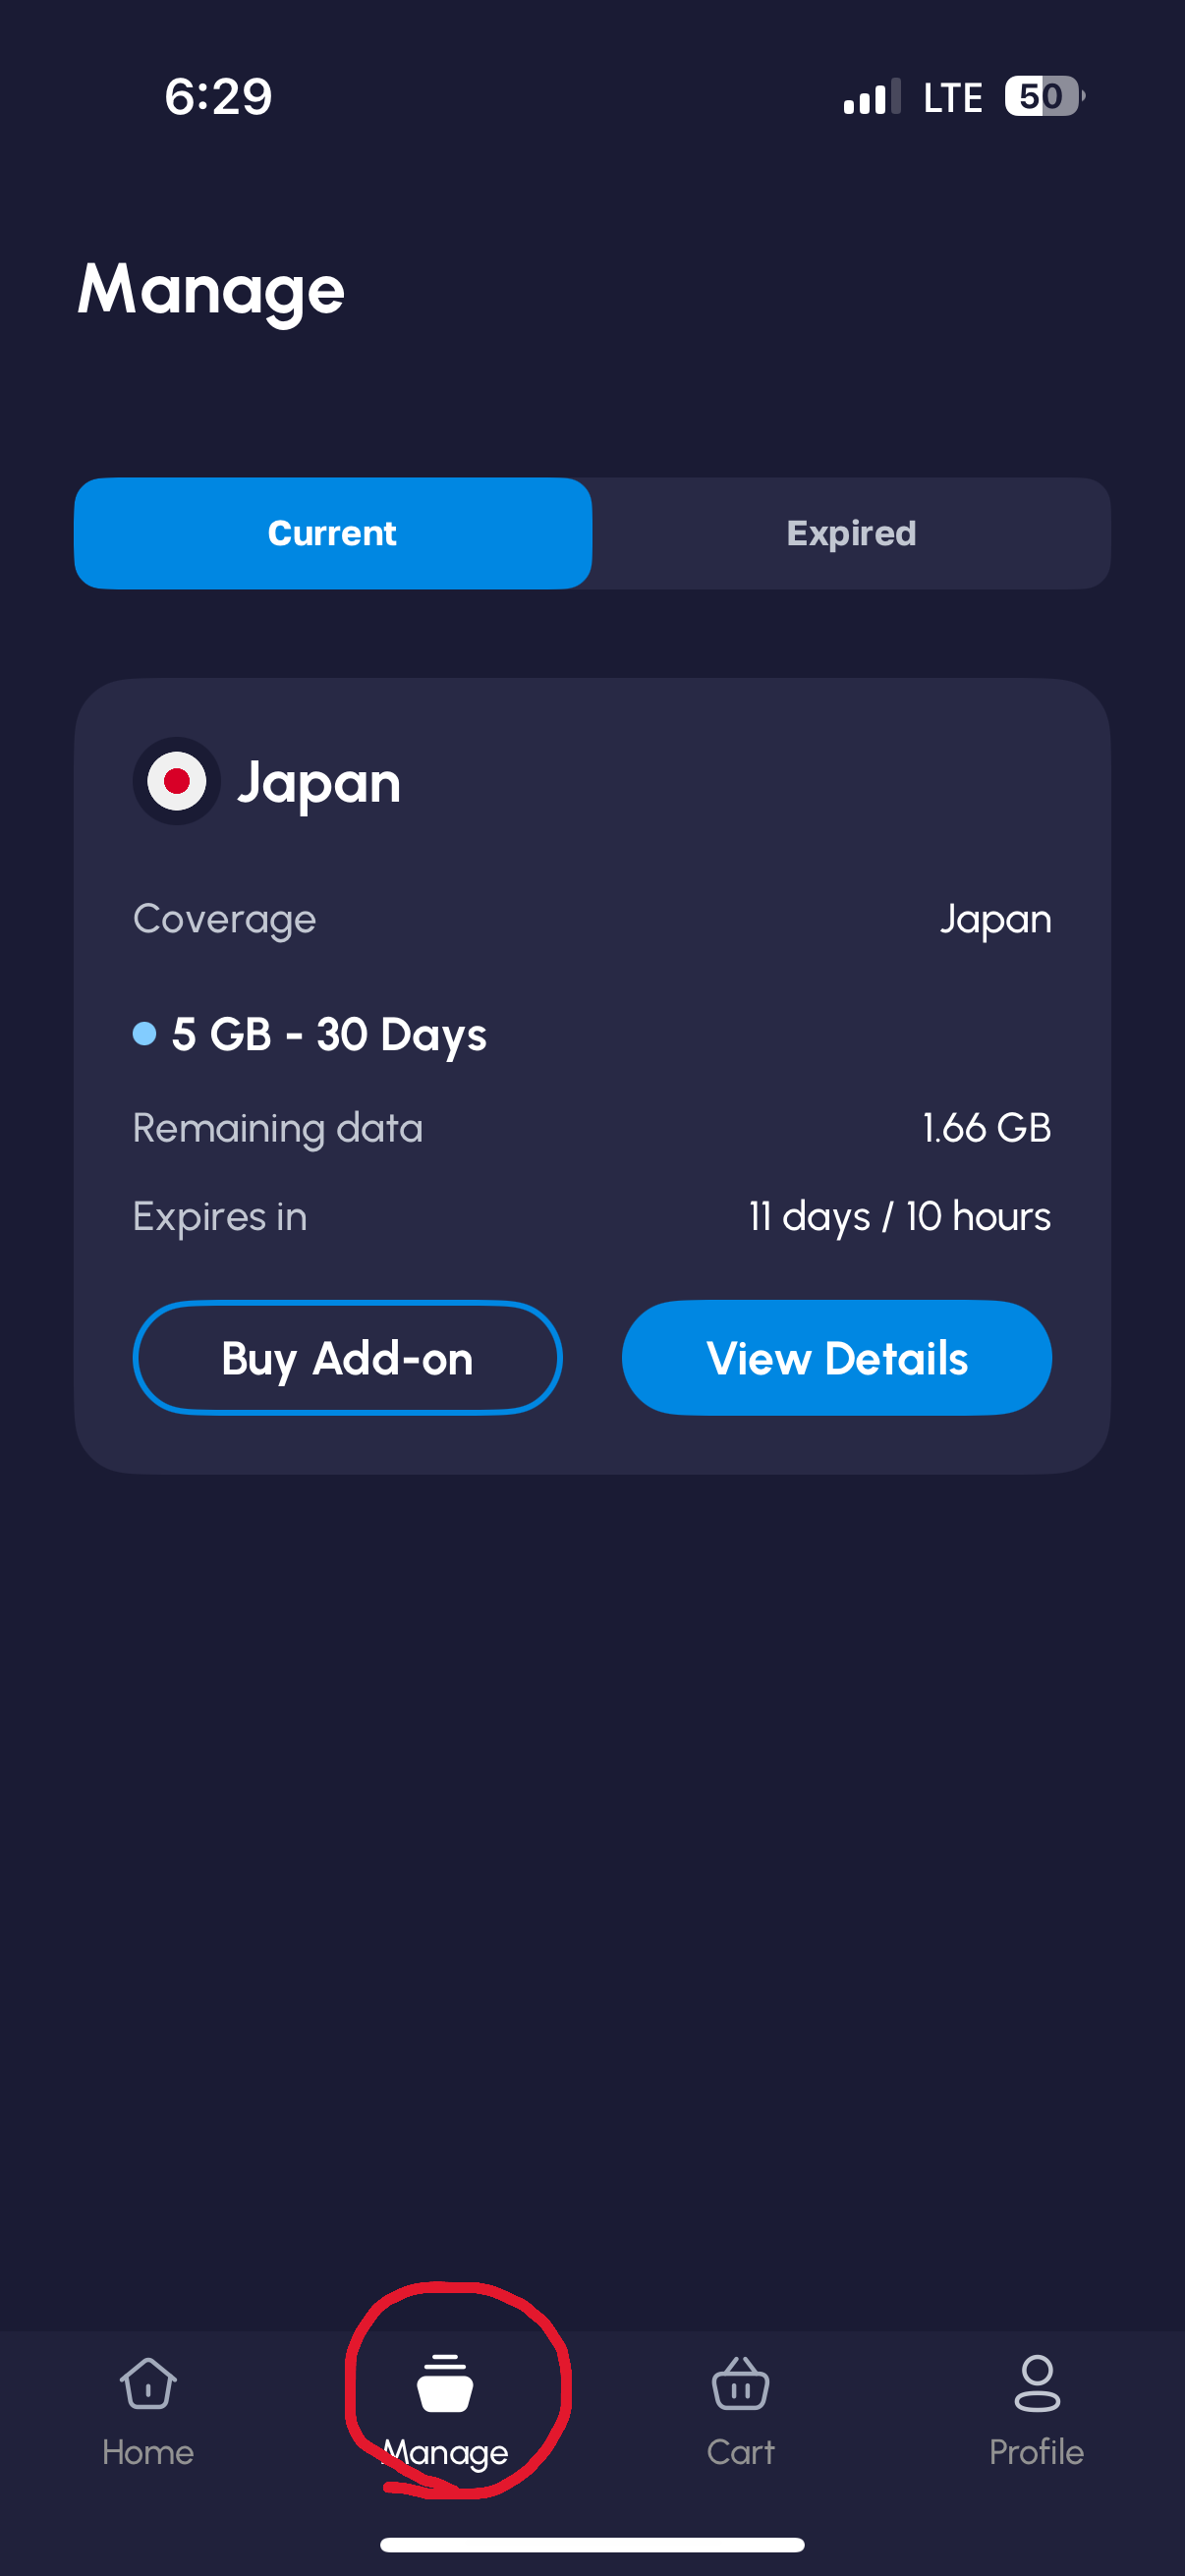
From the vendor's app screen, you may tap "Manage" to see how much data you have remaining at any point in time, or to buy more data. At the end of the trip, I still have 1.66 GB of data left on my travel eSIM. After you have returned to the USA Configure your settings to be the same as before you leave home. i.e., turn OFF the travel eSIM, and set your Cellular Data to use your Primary eSIM.While at home, you may also want to enable the "Send as Text Messsage" in sending in SMS green bubbles when iMessage is unavailable. You may delete your travel eSIM when you no longer need it. |